Git and Bitbucket
Git is a version control system that allows users to use keep a record of changes made to files on a remote repository. It also allows for collaboration with others on projects. Users will have two repositories, one local (which is the user’s working directory) and one remote (the origin or master) that is shared by all who are collaborating on a project. When using Git, users can change and save files on their local repositories as well as commit them to the remote repository (in our case via Bitbucket) by using the push command and retrieve them by using the pull command. They can also make branches of their files to work on and then merge them with the original branch.
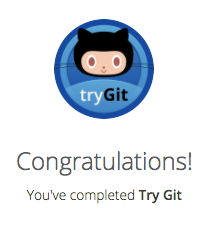
At the beginning of the semester, I completed the tryGit tutorial on Github, Code School's tutorial Try Git (and included my badge on this page) as well as the Learn Git Bitbucket Cloud tutorial offered on Bitbucket. This was my first tutorial on using Git and Bitbucket. One observation that I made was that I could see on Bitbucket that I’d made two initial commits. I realized that this was because I did an initial commit before the tutorial. I learned from this observation that the purpose of an initial commit is that only one initial commit should be used as it's meant to be the first commit for a new repository. I also completed Learn about code review in Bitbucket Cloud. By going through this tutorial, I learned how to fork, or make a branch of, a file from a remote repository. I then made a change to the file and pushed the file back to the remote repository. I then made a pull request for the file to be reviewed and approved for incorporation into the original file.
There are many things that I like about using Git and Bitbucket. I like being able to keep track of my files and have a record of the changes that I made on a remote repository. I am now more comfortable using the terminal commands to navigate through folders and files and make commits. Looking at the comments on my commits page, I realize that some of the comments could've been more specific while perhaps others were too specific. As I gain practice, I am confident that I will be able to hone my commenting skills. Initially, I thought that I had to comment on each change that I made when making a commit. I learned over the course of the semester that this is not the case. For example, if I have two images that I added to my image folder but I only make a comment that I added one image, both images will still be committed and added to the repository. This is why it is important to be as accurate as possible within one commit message. I can see how using a version control system such as Git will become very important when collaborating with others on a project.
Making a Commit
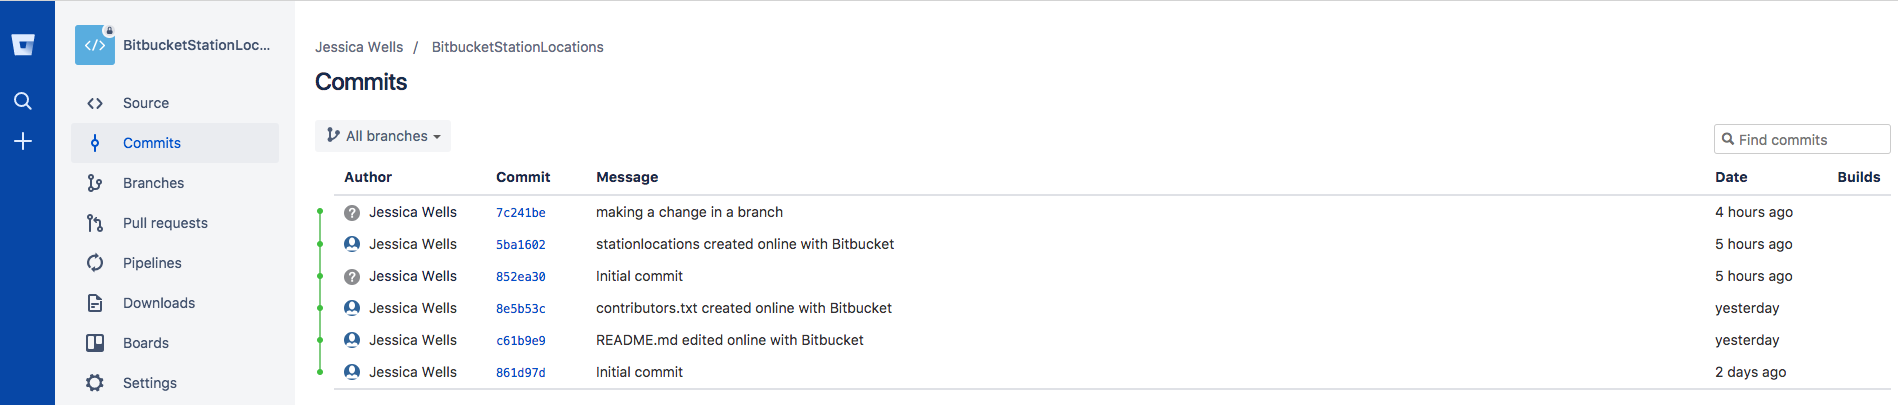
The purpose of the commits page is to show the history of changes made to a repository of files. The commits page provides information about who made the changes to the repository, a unique identifier number for that change, a message that indicates the change that was made and the time that the commit was made. When multiple people are working on a project they must be able to see what changes were made when and by whom. Therefore, having a commits page is essential for the successful collaboration of a project. The following screenshot shows commits that I made to a remote repository based on the tutorial that I followed.
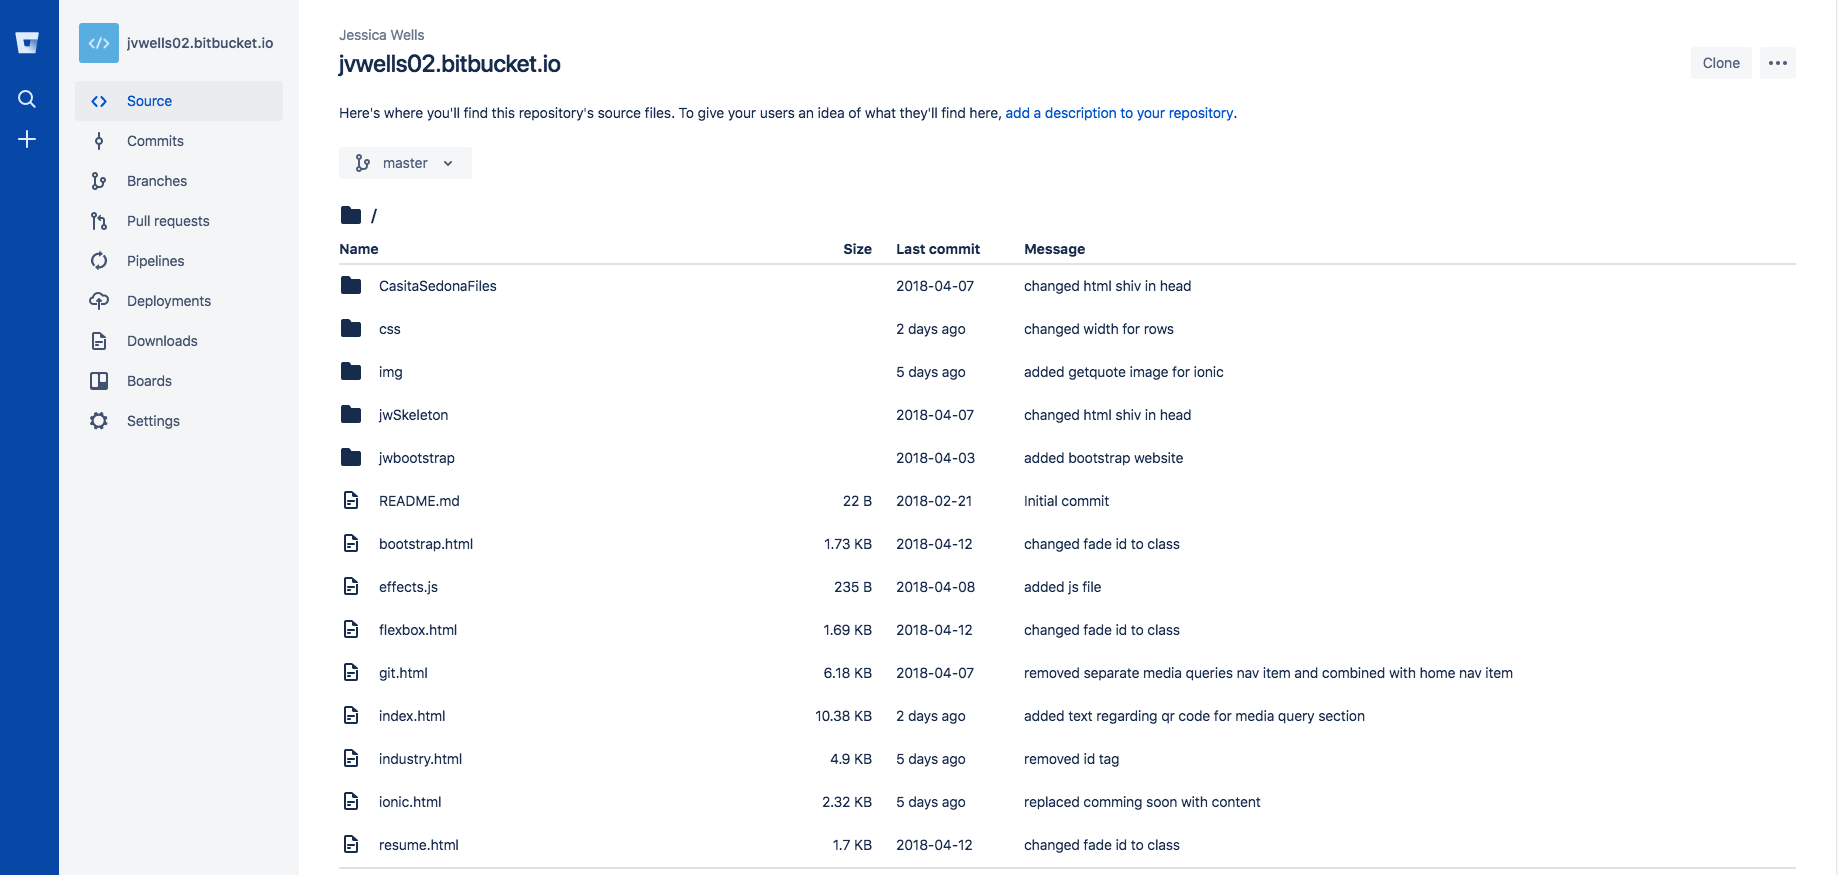
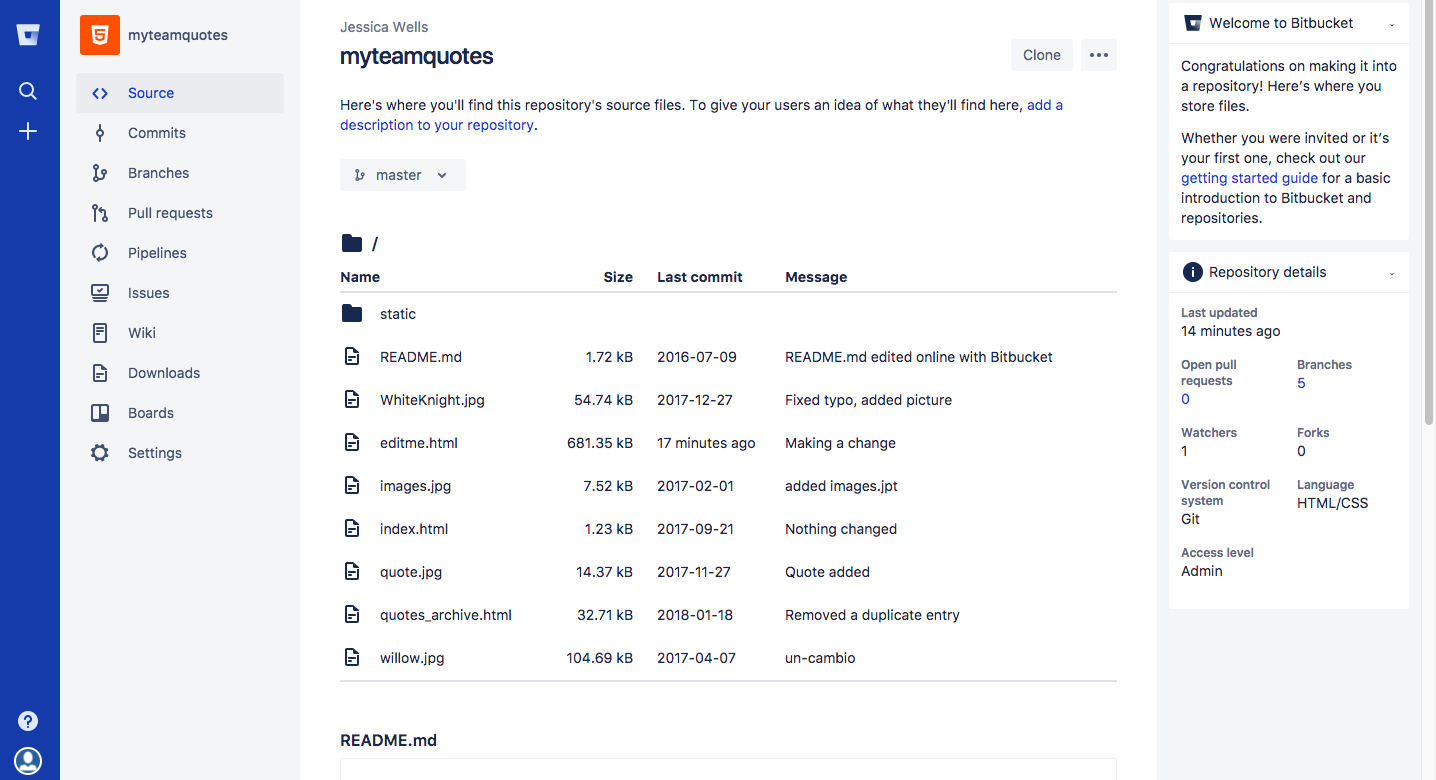
The following screenshot shows the source files on my remote repository for my DPR 241 Portfolio.
The following screenshot shows commits that I made to my remote repository for my DPR 241 Portfolio.

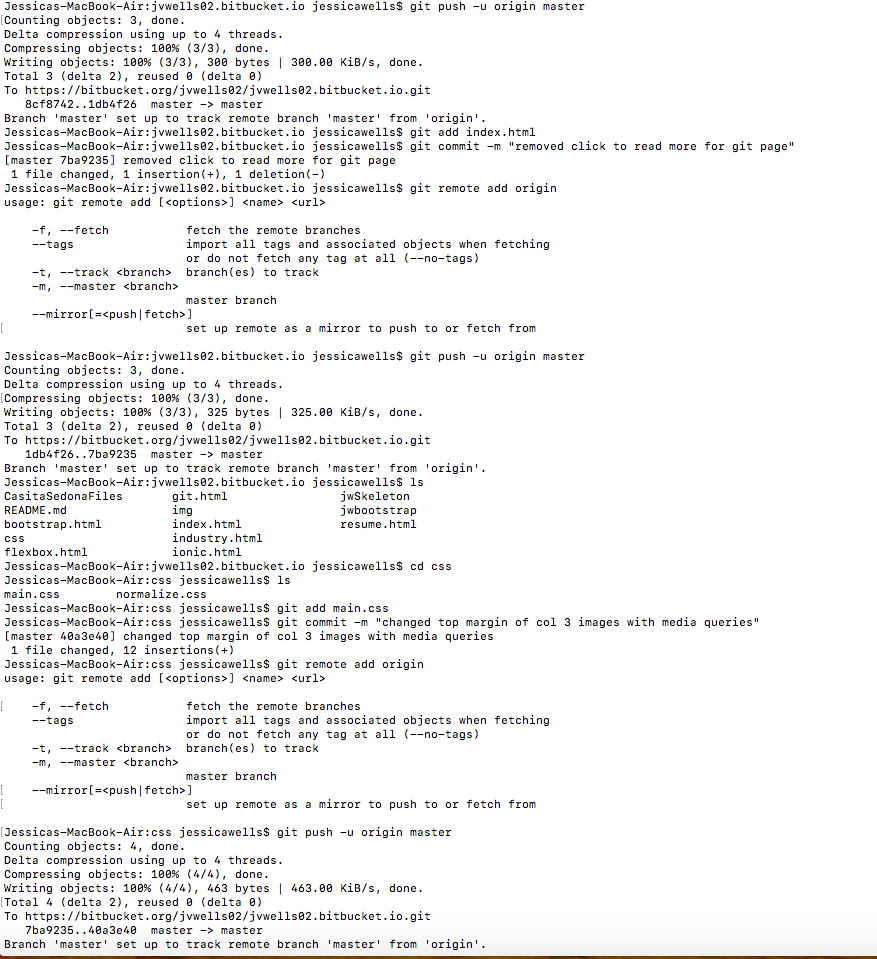
The following screenshot shows the terminal window with commands used to make changes to my DPR 241 Portfolio files.
Forking a Repository
Forking a repository allows a person to make a copy of a project in order to collaborate on a team project. This can be done by first forking the repository and preparing a clone of the repository using the version control system. In order to clone the repository onto one's local repository, one must first use the terminal to change to the git repository directory and then enter the git clone repository url information from the version control system. Changes can be made using git add, saved using git commit and added separately to the remote repository using git push.
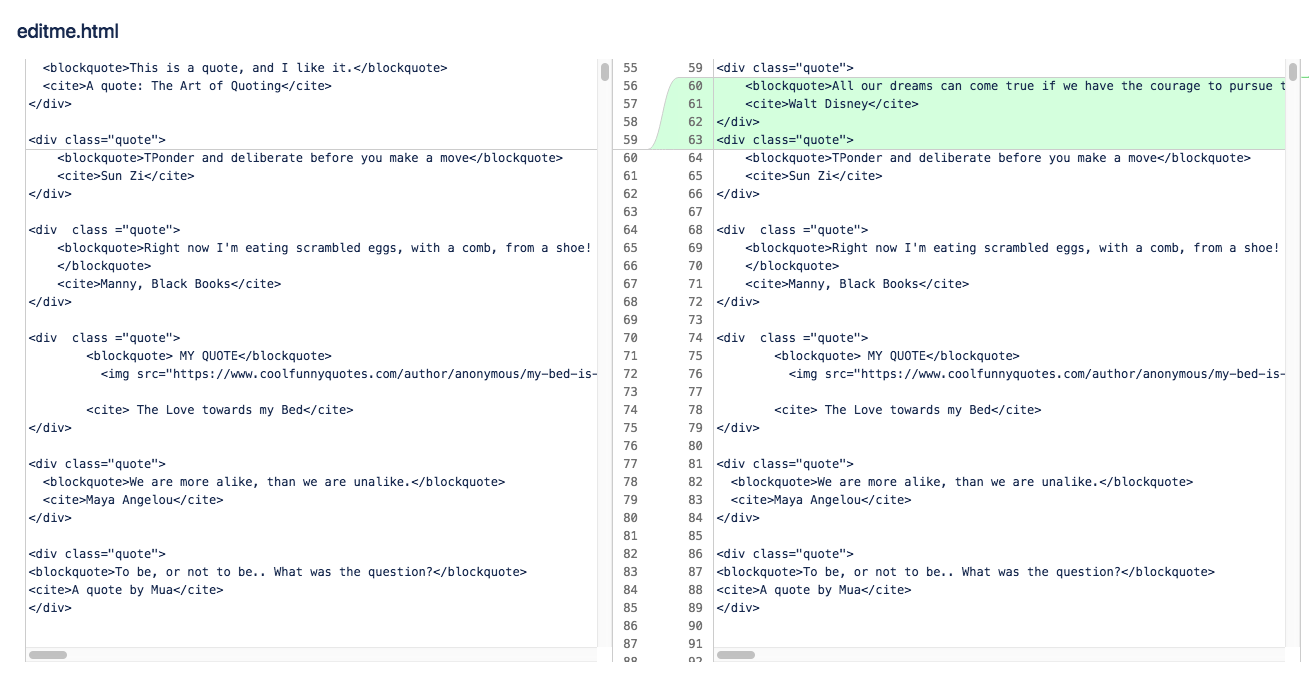
I was able to experience forking a repository by following the Bitbucket tutorial on forking. In the tutorial, I forked a remote repository and then copied it so that I could have it on my local repository. I then opened the editme.html file which contained inspirational quotes and added a quote of my choosing. Once I did this, I looked at the status on the terminal window and saw the notification that the editme.html file hadn’t been staged for a commit. I then added my changes locally and committed the change. I then pushed my changes to the Bitbucket fork. The following screenshot shows that a change was made to the editme.html file. Since the tutorial, I have not have an opportunity to collaborate with others on a project and so have not forked and made changes to remote repositories. I am looking forward to having more opportunities to fork repositories and make changes when collaborating with others on projects in the future.
 .
.
Creating a Pull Request
In order for changes to be incorporated into a remote repository one must first make a pull request on Bitbucket. The owner of the remote repository can then do a "code review." This can be acheived by looking at the file that was pushed onto the remote repository and then comparing and contrasting the branches to see what changes were made and how the files differ. After the file has been reviewed the owner can then determine whether to allow the branch to be merged into the original file on the remote repository. Being able to look at the file and see the changes made as well have a side by side view of the different versions in order to compare and contrast them is very useful. Making a pull request allows the owner of the repository to view the changes that were made, compare and contrast them to the original and then determine if the changes should be incorporated into the project.
Following the Bitbucket tutorial on forking, I followed a Bitbucket tutorial on creating a pull request. In the tutorial, I clicked the compare button on the remote repository and then chose a side by side view that showed the difference between the original repository on the left and the forked repository on the right. The text highlighted in green is the quote that I added to the forked repository. I then created a pull request using Bitbucket and then waited for approval.
Since the tutorial, I have not had an opportunity to collaborate with others on a project and so have not done any other pull requests. I am looking forward to having more opportunities to use pull requests when collaborating with others on projects in the future.